
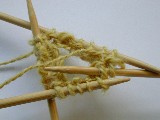
Getting Started with DPNs in Four Easy Steps
![]() Go to the DPN Overview
Go to the DPN Overview
![]() Go to the DPN Buyer's Guide
Go to the DPN Buyer's Guide

If possible, cast all your stitches onto one needle. You can put a tip protector or rubber band on the non-working end of the needle to keep stitches from falling off.
The reason for this is simple: You want your cast-on stitches to be as consistent in gauge and appearance as possible. Casting on multiple needles introduces the risk of slipped, twisted, or loose stitches at each needle join.
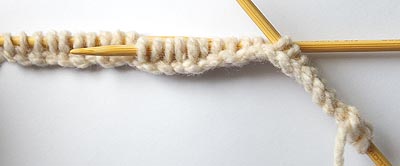
Depending on which technique you use, you'll want to divide your stitches evenly onto either three or four needles. The most common technique is to work on three needles and use the fourth needle for knitting, so that's the technique I'll describe here.
The easiest way to divide your stitches is to lay the needles flat on a table. You can fix any twists and then easily slide stitches onto the DPNs without much additional jostling.
Lay the work so that the left-most needle has your first cast-on stitches and the right-most needle has the working yarn.
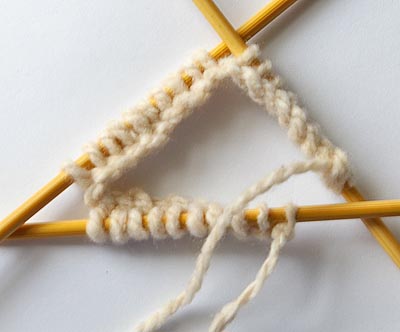
At this point you should have all your stitches evenly divided on the needles. They should be arranged in one long row on a flat surface, with the working yarn and final cast-on stitches on the right-most needle.
Give the stitches one final check to make sure they all face the same direction and haven't twisted—something cast-on stitches love to do.
Now take the left needle in your left hand and the right needle in your right hand. Bring these two needles together, with the middle needle forming a triangle.
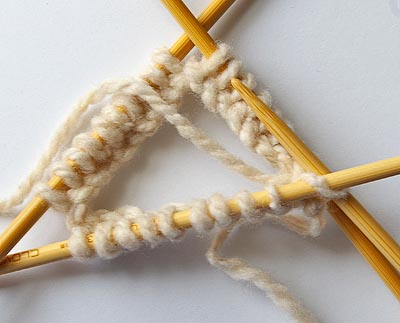
Step 4: Begin Knitting in the Round
With the triangle still in place (the working yarn should be on your right), take a new, empty needle and begin knitting the stitches on the left needle. In doing so, you've joined the work and are now knitting in the round.
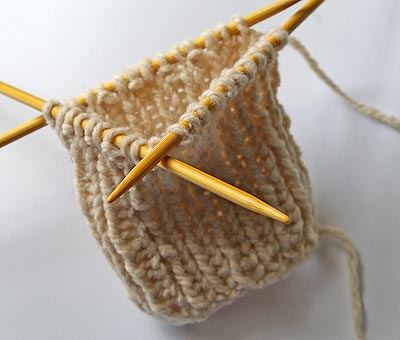
Congratulations, you did it!
Extra Tip: Beware of Ladders
As mentioned in the DPN Overview, you'll need to knit the first and last stitches of each needle more tightly than the rest. This is because stitches have a tendency to loosen at the spot where two DPNs join, which can cause long "ladders" of loose stitches.
You can also randomly move the end stitches from one needle to the other so that there's no clear join ridge. The only drawback here is that it can throw off your stitch count if you aren't careful.
If at First You Don't Succeed...
Your knitting may feel loose and precarious for the first few rounds, but don't fret. Once you get going, these stitches will stay put and you can begin to gather speed.
This whole cast-on process gets significantly easier with time, so if you have problems at first, don't give up. You'll be glad you stuck with it.
![]() Discuss working with DPNs in our Forums
Discuss working with DPNs in our Forums
Previous Reader Comments
"I like bamboo circulars for their comfort but I prefer the type with a
plastic cable that's joined directly to the needles (like Clover or
Plymouth). I found that the metal gussets on these Crystal Palace needles
tend to catch on the yarn and snag it." mspizziri, 7/29/2002
"Another way to join the beginning round when making socks. Pass the first
stich on needle one over the last stitch on needle three. This twisted
stitch doesn't show and really tightens up the joining." knittenkitten, 11/26/2001
"I hate it when one sock is finished, I still have a whole sock to go until
I thought, why not knit both socks at the same time and finish one Pair
instead of just one sock. Knit back and forth on one and then the
other.Soon a pair of socks is finished." woolspinner, 10/6/2001
"Wow... I've been very intimidated by DPNs, and have yet to find any
instructions clear enough to explain the process, until now! Thank you so
much for this tutorial! I can't wait to try them!! Happy knitting to all!" wrenjen, 7/12/01
"Thank you for this article. I love socks and I have started one pair but
got discouraged in trying to handle the 3 needles. I now have a better
understanding of how to go about it again. I just bought a sock knitting
machine from ebay, but it is still in the box. I want to knit them myself!
The machine will have to wait for a while. Thanks again." Ruth, 7/8/01
"I use to slide stitches too. However, I found that if I worked the first
stitch and THEN moved my working needle up and over, moving it closely
and parallel to the last needle, my work was evenly knitted. I am going
to start adding that extra stitch. Thanks for sharing." slipstitch67, 5/01/01
"I think your instructions were perfect. I just learnet how to knit on four
needles and that is the exact way the I do it and I have found it very
easy. Coming from someone who is 65 and always afraid to do it as I
thought it was too hard for me. Never to old to learn I guess." Elaine, 4/27/01
Great minds think alike! Thanks to both Pat and Laura for submitting this excellent tip. -Clara
"I have a small tip to add that I find very useful at least for me. I add one (1) extra stitch and
when I join together in the round I knit the last stitch together with the first stitch making a tighter join with no additional stitch." Pat, 4/27/01
"When casting onto DPNs, I cast on an extra stitch. When I go to start my
first row, I slide the last cast on stitch onto the left hand needle. I
then knit two stitches together, thereby avoiding the loop that is caused
by the join." Laura, 4/27/01
"I use all five of my dp needles. There are always four with
stitches. The fifth I'm knitting with. This makes a square sock instead of
a triangle. Somehow it seems easier to handle. Also the idea of migrating a few stitches works great when knitting socks
with two strands of yarn in each row. I knit several stitches from the
needle in my left hand before starting to knit on the new, empty needle.
When I learned this I could stop using those incomfortable little
circulars, and wow! no more ladders." hoffish, 4/27/01


